
Working with rivet nuts without tools is challenging, as then it will require you to have a bolt that must have its own nut and must fit into the rivet nut. But still, a larger bushing or washer is also required so that it can tightly fit around the bolt. However, this hassle is not necessary when the rivet nut tool can easily be used to install the rivet nuts. But some installation techniques should be learned on how to install the Qfun rivet nut tool, and these are highlighted in the following article.
Installation Details
The installation of rivet nut tool is easy when the below-mentioned steps are followed:
Step 1: Inspection of the Tool
Before the actual process of installation is started the thread of the mandrel and rivet nut should be inspected to make sure all parts are intact.
Step 2: Rivet Nut Threading
After inspecting the tool, the threading of rivet nut into the mandrel is required. For this purpose, the rivet should be turned in the clockwise direction and should be continued until the bottom of the holding nut of the tool is completely intact with the flared head of the nut. Also, select the appropriate mandrel to fit the gun head. Make sure the arms of the gun are open and install the nut on the mandrel.
Step 3: Sliding The Rivet Nut
In this step, it is necessary to ensure that the hole that is used should be of the correct size. Then into the whole of the metal slide the chosen rivet nut with the help of the gun and press the arms to rivet the nut in place.
Step 4: Turn Ratchet
By turning the ratchet clockwise, the rivet nut can be drawn towards the metal. Simultaneously, holding the wrench in place apply the counter-clockwise pressure. Continue the turning until the rivet nut is securely locked and screwed into the metal. Continue pushing down the handle until the rivet nut is tight.
Step 5: Remove Pressure
Release the pressure from the mandrel by reversing the direction of the ratchet in the gun. Also by using hands turn the drawing nut in an anti-clockwise direction, this will ultimately detach the mandrel from the nut that has been installed.
Step 6: Install Bolt
In order to stop the rivet nut to spin in the metal, put the bolt on the rivet nut and tighten it.
Precautions
Following safety precautions must be taken into account before using a rivet nut tool.
- Read the instruction manual that comes with the tool thoroughly, it will tell more about the installation steps and will facilitate you in working better with the tool.
- Wear safety goggles and gloves. This is because while using the rivet nut tool the debris and flying particles can put you at the risk of injury. So it is necessary to wear the required protection.
- Regularly maintain your rivet nut tool kit.
- Do not over squeeze the handles as it can strip the nuts.
- Use stainless steel wipes to clean the tool.
- Lubricate the tool when required.
Recommendation
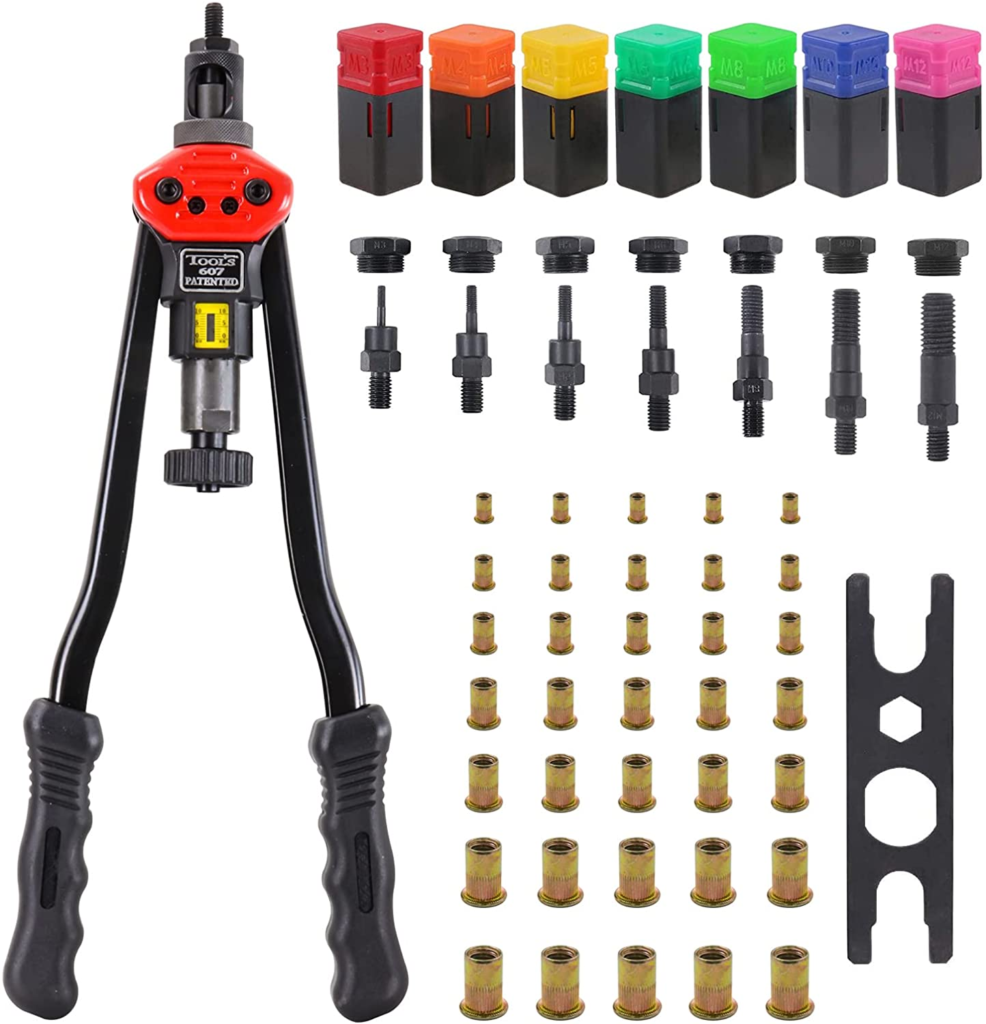
Riveting jobs are tiring and these can be made more efficient and convenient with the help of a Qfun rivet nut toolkit. The product is highly durable because it is made up of solid and sturdy carbon steel. The product has been designed carefully while considering the convenience of the customers, hence, the nicely designed and easy-to-use knob has been placed between the handle of the gun. The kit is equipped with 70 pcs of rivet nuts and 7pcs of mandrels which are interchangeable. Furthermore, the tool can be used for a wide range of applications such as mounting bicycles, jeep modifications, body panels, furniture decorations and other customised fastening solutions for riveting applications. As compared to the 13-inch rivet nut tool, the product incorporates an ergonomic and 16-inch longer carbon steel arm to save power. The button design between the handles for easily unloading the rivet nuts cannot be found in other rivet nut gun tool kits that too in an affordable price range. That is why the rivet nut gun tool is highly recommended to make riveting jobs easier.
No responses yet